Wall Bullet Hits
Here is a very safe and effective method of making realistic bullet
hits using modified mouse traps. Traditional methods use squibs
(small explosive charges) to blast small holes into walls or objects
to create the effect of a bullet strike. However, squibs can be very
dangerous and should not be used unless you are a trained and licensed
pyrotechnician. This method is very easy and allows
anyone to create realistic, safe bullet strikes on a low budget.
Click here to
view example video
WallBulletHits.wmv 587KB
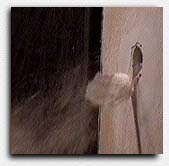
How it works
This diagram shows how this method works. The bullet hole is precut
and a nail is placed in the bullet hole. It is then filled with
small pieces of debris and held in place by a thin layer of plaster.
A modified mouse trap is screwed to the back of the wall. When the release pin is pulled, the flat plate hits the nail driving it and
the debris outward, give the illusion that a bullet has struck the
wall. Below shows how the mousetrap has been modified.
Modified Mouse Trap
As you can see in the images, there is not much to the modified trap.
The small strip of metal can be soldered in place (or glued using J-B
WELD). The release pin is made out of stiff wire and held in place
with eye screws. A hole is drilled through the trap for the nail to sick
through where it
will be struck by the metal strip. The animation shows how the
mousetrap strikes the nail when the pin is pulled.
Step-By-Step Set Up
|
STEP 1

Start by drilling holes where the bullet holes are needed. Use a drill
bit slightly wider than the width of the nail. |
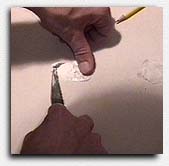
STEP 2
Use a knife to carve out the desired bullet holes. Do not make the
bullet hole too deep. Carve the hole about half the thickness of the board.
Save the bits of dry wall. They will be needed later. |
STEP 3
Put the nail into the hole. Shingle nails work the best. The nail
should only stick out the back about 3/4 inch. The sharp point off the
nail must be ground or cut off for safety . |
STEP 4
Place pieces of dry wall into the bullet hole. Also add fine dust to it. This
will be the debris that will shoot out from the wall. |
|
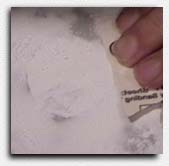
STEP 5
Use a flat object (I used a mouse trap) to pack the debris
down. Try to get it as flat as you can. |
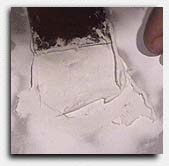
STEP 6
We need to separate the plaster from the debris, otherwise
the plaster will cement everything together. Draw out a circle
on wax paper slightly larger then the bullet hole. |
STEP 7
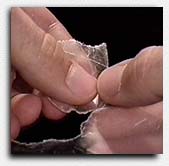
Use your fingers to tear a jagged circle pattern out of the
wax paper. |
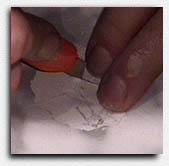
STEP 8
Using a small trowel, add a thin layer of plaster over the wax
paper and bullet hole. I find premixed plaster works the best.
Try to apply it as smooth as possible. |
|
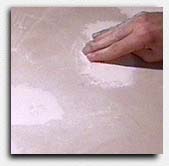
STEP 9
Sand it down smooth and flush to the surface. |
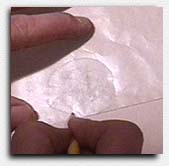
STEP 10
This part is very important. You must cut an X across the wax
paper so that the plaster will break apart when the nail
pushes through it. |
STEP 11
Here is an example of what happens if you don't cut the wax
paper. The debris blast out but the entire piece of wax paper
is left hanging, wrecking the illusion that it was a bullet strike. |
STEP 12
Once the wax paper is cut into pieces, carefully apply another
layer of plaster. Do not make it too thick, just enough to hold
it all together. Try to get the plaster as smooth as possible
so you don't have to sand as much later. |
|
STEP 13
Once the plaster has dried it can be sanded. It is very important
to get it as smooth and flush to the surface as you
can.
|
STEP 14
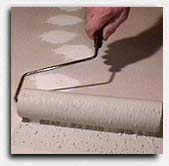
Once you're done sanding, clean the dust off the surface with a
damp cloth. You're now ready to paint the wall with the desired color. |
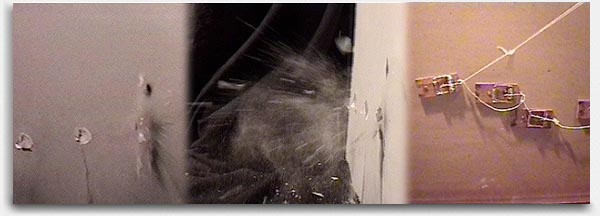
STEP 15
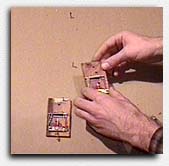
Turn the wall over and carefully set the mouse traps on the
nails. Screw the mousetraps in place. |
STEP 16
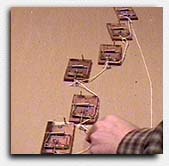
Tie a strong string to the mousetrap release pins. Tie them
together in series so when the string is pulled they fire one
after the other. |
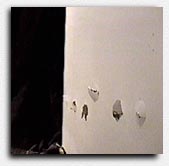
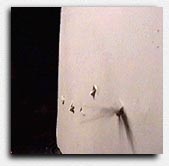
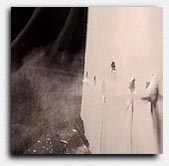
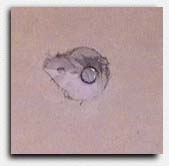
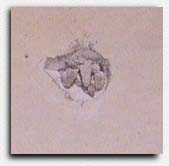
Trial and Error
It's very important to experiment and practice to get this technique
right. It is a very effective method if it's done right. Here are a few
examples of what can happen if this method is not done right. Example
3 was successful, but example 1 & 2 were not as successful.
The problem in example 1 was that the plaster was too thick and
the mousetrap did not have enough force to break all the
plaster. The plaster on the last bullet hit was so think that the
nail couldn't even break through it. In example 2 the nail
heads were to small. So the nail just passed through the debris and plaster
without blasting it all outward. A nail with a large head should be
used. Shingle nails work the best. However, the effect in example
2 may be desired for small caliber bullet hits. You just have to experiment to get
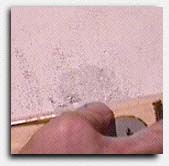
the effect you want. Example 3 was successful. The
mousetrap release stings were pulled very fast to give the illusion
of machine gun fire. The plaster was applied very thin and large
head shingle nails were used. Another thing to consider
is that this setup is time consuming. Do not start making these
walls on the day of the shoot. Have them done ahead of time.
You should make 2 or 3 fake walls (if your budget allows it) just
incase something goes wrong with the first shot. It's always a good
idea to do a few takes of the shot so the best one can be used
for the movie. This concludes the crash course on making
bullet wall hits. If you have any questions you can
. If you use
this method on your project, please let me know how it worked out.
Good luck and have fun.
|